How to use the DCM4CHE command line tools

The DCM4CHE command line tools are really handy for some use cases.

You can find the command line tools realeases here

The version 5.34.0 are currently the latest ones.
On the github page they link to the binary downloadable versions here

Just unzip it and then you can use them.

Documentation can be found here GitHub - dcm4che/dcm4che: DICOM Implementation in JAVA

For example the storescu command can be used to send dicom files like this

storescu.bat -c <AET>@<host>:<port> <path_to_dicom_file_or_directory>

For me this would be

storescu.bat -c DCM4CHEE@ubuntu:11112 C:\downloads\dicom-test\2.25.295815560780803339366577056398026283395\2.25.147245794924701740687715738465713246299

You can also for example wrap a pdf into DICOM with the pdf2dcm command

Usage example here:

pdf2dcm.bat C:\downloads\dicom-test\pdf\pdf-sample-report.pdf C:\downloads\dicom-test\pdf\report.dcm

You will not get a patientId etc. into the dicom tags but you can do that by providing a
metadata.xml in addition to the pdf.

To check the contents of the DICOM tags you can use:

dcmdump.bat C:\downloads\dicom-test\pdf\report.dcm

Video on using the tools

1 Like

Here is one more example where the CALLING AE is given with the -b option and a folder is given. This is handy for sending multiple files in one go and it will iterate through sub folders.

C:\dcm4che-5.23.1\bin>storescu.bat -b CALLINGAE -c DCM4CHEE@ubuntu:104 C:\downloads\dicom-test\

The tool first scans through the folders, including subfolders, and then iterates and sends everything.

“Sent 610 objects (=256.63 MB) in 136.192 s (=1.958 MB/s)”

Here is one more example where we modify some dicom tags with tag names and one dicom tag with tag number.

storescu.bat -b CALLINGAE -c DCM4CHEE@ubuntu:104 -s “PatientName=TEST^ANDERSSON” -s “PatientID=12345A” -s “IssuerOfPatientID=1.2.3” -s “00401008=CONFIDENTIAL” – C:\downloads\dicom-test\

If you are using the same test material multiple times you might run into SUID conflicts.
So you could add --uid-suffix .1 so that you change Study UID, Series UID and Instance UID adding to the end. This only works if the original test content you have has UID’s which are not yet at the max length of 64 chars.

storescu.bat -b CALLINGAE -c DCM4CHEE@ubuntu:104 -s “PatientName=TEST^ANDERSSON” -s “PatientID=12345A” -s “IssuerOfPatientID=1.2.3” -s “00401008=CONFIDENTIAL” --uid-suffix .1 – C:\downloads\dicom-test\

Hello everyone,

I’m working on a university project where I need to simulate a basic medical imaging workflow using Orthanc as a DICOM server and dcm4che as a client toolkit.

Currently, I have Orthanc running on port 104, and I would like to simulate another DICOM node (a radiologist’s workstation) communicating with it on port 11112. The goal is to send, query, and retrieve DICOM images — in other words, perform C-STORE, C-FIND, and C-MOVE operations to generate realistic network traffic for later security analysis.

So far, I’ve been able to send images to Orthanc using this command:

./dcm4che/bin/storescu -c ORTHANC@localhost:104 /directory to the images .dcm

However, I’m struggling to understand how to correctly set up the connection for the next steps:

  • How to configure a second DICOM AE (for example, a workstation on port 11112)?
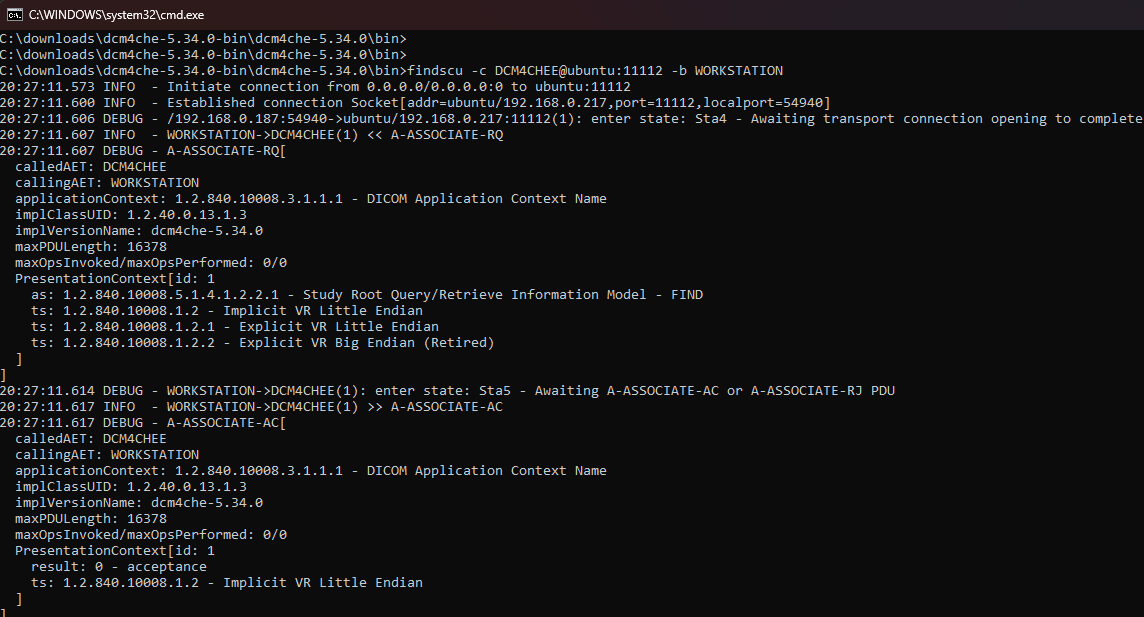
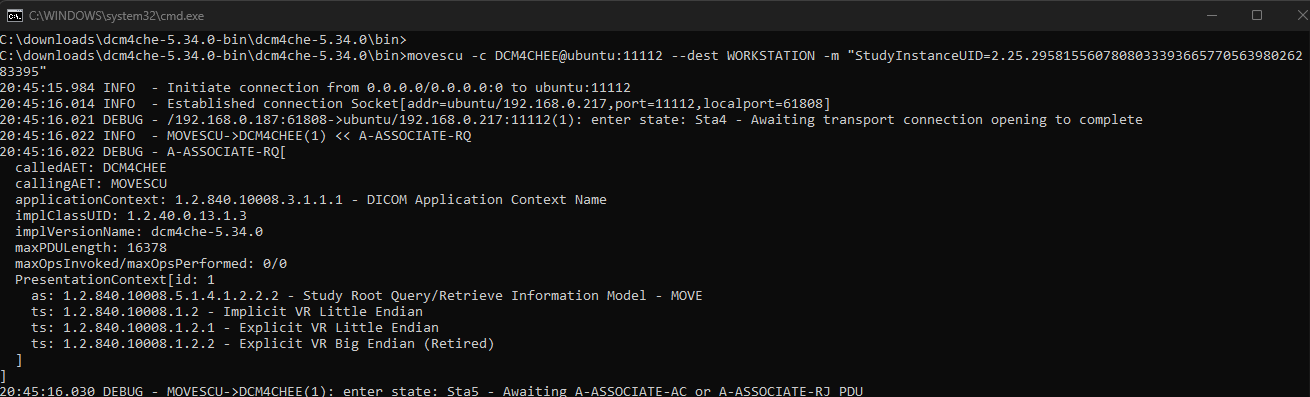
  • How to use findscu and movescu properly so that Orthanc responds to C-FIND queries and sends images to that second AE using C-MOVE?

In the project instructions, we are asked to:

  • Configure Orthanc as a PACS on port 104.
  • Simulate a professional requesting images from another port (11112).
  • Use findscu and movescu from dcm4che to perform these interactions.

Could someone please explain (or show an example) of how to correctly configure both sides — Orthanc and the dcm4che tools — so that the C-MOVE operation works between port 104 (Orthanc) and port 11112 (the simulated workstation)?

Thanks in advance for any help or example configuration!

Welcome to the community.

Here is an example of using findscu. This is with my test server I used in the video.
And this is a find for all studies in the system.

findscu -c DCM4CHEE@ubuntu:11112 -b WORKSTATION -L STUDY

For you the same would be based on your previous post

findscu -c ORTHANC@localhost:104 -b WORKSTATION -L STUDY

Please also check the readme for further parameters dcm4che/dcm4che-tool/dcm4che-tool-findscu/README.md at master · dcm4che/dcm4che · GitHub

Doing the movescu part is a bit more involved.

If you ask chatgpt it will give you quite good guidance on the topic.

The DICOM C-MOVE is a command for saying to the the PACS server please send study X to destination Y.

  1. You will need to configure ORTHANC to have destination Y configured
  2. You can use storescp as the reveiver (WORKSTATION) so the above Y destination
  3. You can use movescu to command ORTHANC to send the study to Y

For the movescu command it will be something like this:

movescu -c DCM4CHEE@ubuntu:11112 --dest WORKSTATION -m "StudyInstanceUID=2.25.295815560780803339366577056398026283395"

For my test below I didn’t actually start storescp to listen for the study so it didn’t actually go anywhere but my PACS server did receive the command.

Hi John,

Thanks a lot for the help earlier, it really helped me get the C-FIND and C-MOVE parts working and I could see everything you said on wireshark!

Now I’m moving to the next part of the project, where I need to implement TLS to compare DICOM communication with and without encryption (for packet analysis and performance comparison).

I have this older example from my professor:

openssl req -x509 -nodes -days 365 -newkey rsa:2048 -keyout orthanc.key -out orthanc.crt

But I’m not sure how this fits into Orthanc’s setup today, do I need to modify again the orthanc.json file to enable TLS, or configure it differently using SSL options?

Any short example or explanation on how to properly enable TLS in Orthanc (and connect dcm4che securely) would be really appreciated.

Thanks again!